
22 November 2020
Introduction
Automation is indispensable in our time. Projects develop, acquire functionality and become more difficult in terms of support. The release of such projects usually takes a lot of time: you need to test the code for errors, compile the update in a quality manner and transfer it to the production server. In the traditional model, updating is done manually by the developer, which leads to the repetition of the same actions, which in turn might lead to missing some errors. That's why developers use DevOps practices to avoid these problems.
Jenkins is a tool that improves the life cycle of a product under development. This tool implements the DevOps requirements of the CI/CD technique - continuous integration and continuous delivery. Jenkins minimizes integration errors, speeds up and performs the operations to improve the quality of the release.
In this article, we'll take a look at this tool and show you how to create a simple job to push updates from Git to your website automatically.
Jenkins and CI/CD
The practice of CI/CD implies a process of continuous integration and delivery of the project code to the target server. This technique contains a set of principles focused on convenience, security, labor savings, build reliability, and project deployment.
CI/CD means the following: CI (Continuous Integration) implements checking and building code, and CD (Continuous Deployment) delivers updates to the working server of the project.
The technique is mainly used in complex projects where the consistency of changes in the code and the quality of update delivery are critical.
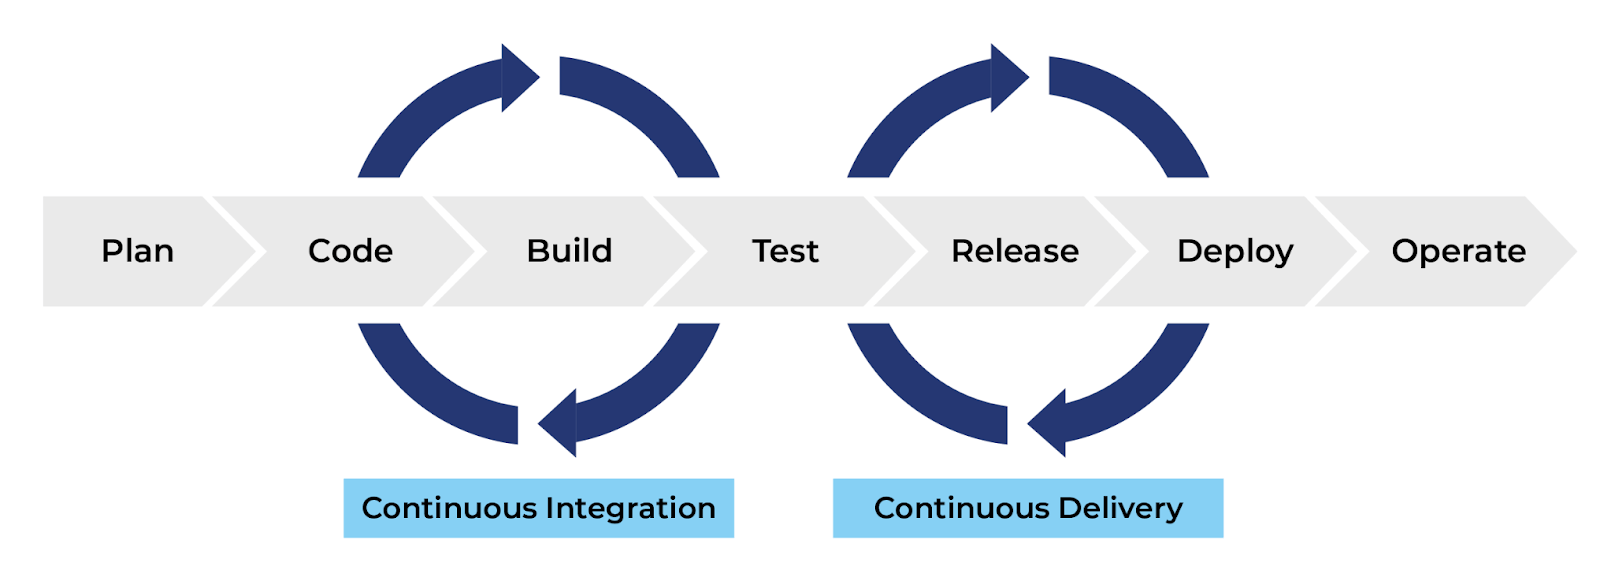
CI/CD process
This technique should be implemented on many projects, but the issue of automation is controversial when:
- the project is young and has not grown to the point where it needs automation;
- the project uses archaic methods, and setting up automation is problematic.
Many products, including GitLab, Docker, Travis-CI, Circle-CI, TeamCity, are already prepared to work with CI/CD, but not all of them use both practices. In addition, each has its own characteristics and limitations. Therefore, it is worth choosing a tool based on needs.
This article will focus on the popular Jenkins service, which implements both CI/CD practices and is suitable for use in projects of different levels of complexity.

Jenkins Logo
Jenkins is a free and in-demand tool in the DevOps world with the ability to flexibly configure build processes, as well as update delivery. It contains hundreds of plug-ins that expand the capabilities of the system and provide flexibility in use.
Key features:
- Autonomy of work and independence of the system, thanks to placement on a dedicated server.
- Numerous available and free plugins from the official website. With their help, you can expand the capabilities of the service and integrate with other systems. The service API allows you to install both the stable versions of plugins and the old ones. You can also create your own plugin and upload it to the system.
- The service provides a wide range of functionality for setting the conditions for building and deploying a project. For example, before uploading changes, you can make a backup copy, and after the transfer, run auto tests.
- DevOps practices often consider using three Dev-Stage-Prod project development servers. Thanks to Jenkins, you can construct a reliable development chain that will ensure the security of deploying releases on the Prod server.
- Own REST API – with its help you can manage and monitor the execution of jobs.
Basically, Jenkins is a bridge between the codebase and the prod server. Project managers use it for bug checking, developer code quality control, integration monitoring, and update delivery.
When to Use CI/CD
If you are reading this article, then you are probably already thinking about improving the quality of the codebase and simplifying its integration using the CI/CD technique. Therefore, we have created a short set of points that are worth considering before implementing the technique in the project.
Basic moments:
- After the release, errors frequently occur, it is necessary to automatically start testing the project.
- The functionality of the system is complex, and the consequences of errors are difficult to eliminate.
- The project requires trouble-free operation and the inadmissibility of errors.
- The team consists of 3 or more people, it is difficult to control changes and find errors.
- Updates are released frequently.
- Release takes a long time.
- Other services are used for quality control, post-processing of the project.
The most important thing is to evaluate the feasibility of using the tool in the project and clarify what practices for maintaining code quality are already in use. We should understand that although the tool provides ample opportunities, all code handlers and test scripts are created by the developer, so you should consider and allocate more time for this, depending on the complexity of the project.
Benefits of Jenkins
Jenkins is a free service that is famous for its extensive set of plugins. There are many other tools out there that outperform Jenkins in some ways. Most of them are paid (TeamCity, Bamboo, Travis, etc.) and provide more tools, but they may be excessive for your project.
Benefits of Jenkins:
- Free service.
- Extensive plug-in library.
- Easy integration with any external development program.
- Availability of support.
- Suitable for large projects.
If you have not used CI/CD tools before, then we recommend using Jenkins. It is almost universal for any project and is suitable for a quick start.
Installing Jenkins
Consider installing Jenkins on a Centos 7 system using Docker.
Docker installation
If docker is not installed, install it.
Download the repository file:
wget -P /etc/yum.repos.d/ https://download.docker.com/linux/centos/docker-ce.repoStart the installation:
yum install docker-ce docker-ce-cli containerd.ioStart Docker and configure autorun:
systemctl enable docker --nowContainer installation
Load containers for Jenkins:
docker pull jenkins/jenkinsStart the container:
docker run -p 8080:8080 --name=jenkins-master jenkins/jenkins:latestOn the screen, you should see the installation code.
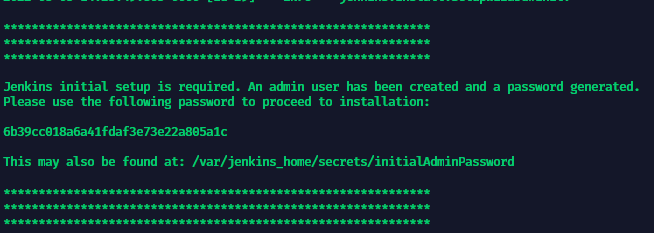
Installation confirmation code
Copy it, open the page https://server_name:8080 in the browser and continue the installation through the web interface.
Web Version Installation
The first step is to enter a password for installation.

Administrator Password Confirmation
The next step will be to install the recommended plugins, or select the ones you need. To implement our example, we install the recommended ones.
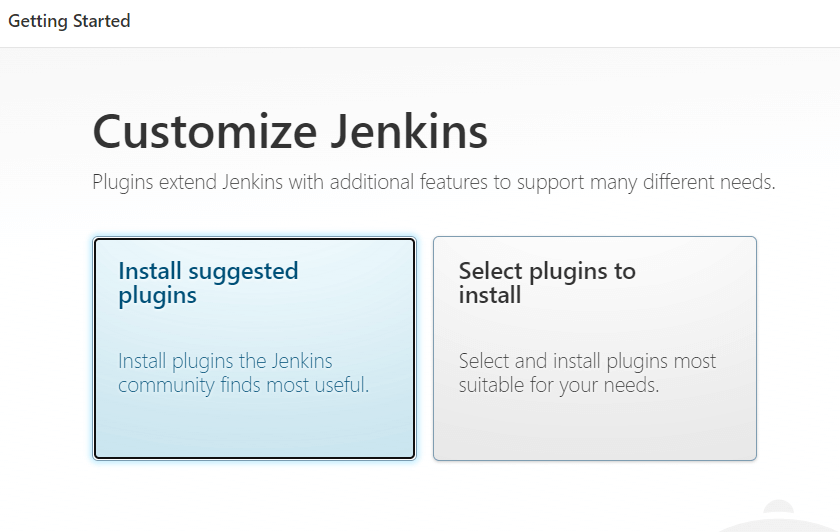
Installing Plug-ins
After installing the plugins, we create the first user and get the address where Jenkins is available. By default, this will be your website's domain, accessed through the port it's running on.
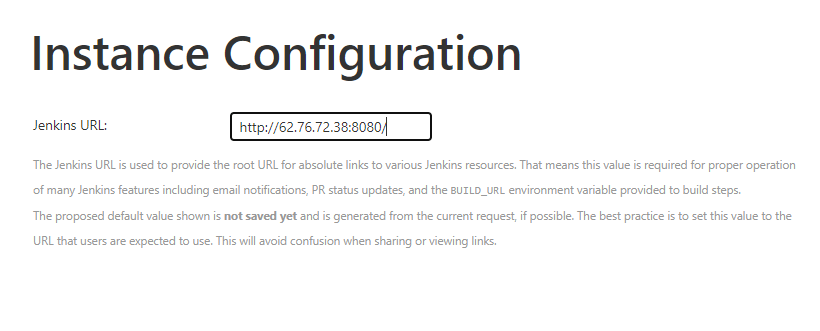
Installation Completion
Now, in the console, interrupt the container with the Ctrl + C combination and run it in the background:
docker start jenkins-masterJenkins is now ready to be set up and running.
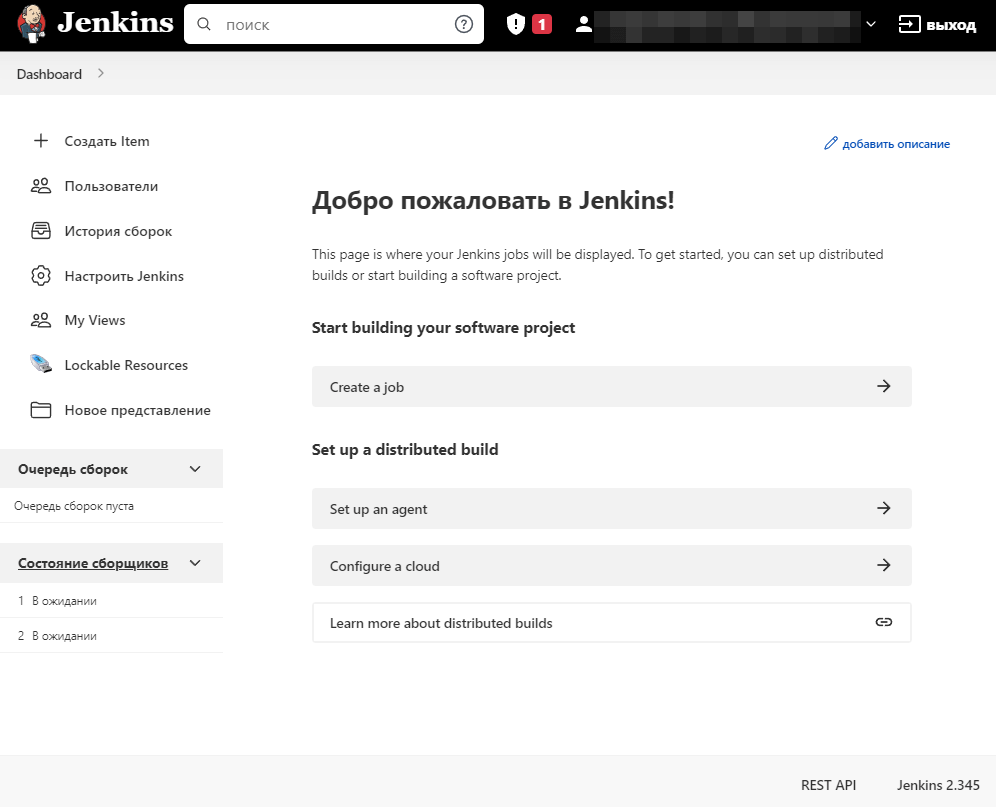
Main page
Job setup example
In this example, we will solve a simple problem: we have a private GitHub repository and a one-page website. You need to set up auto-deploy of changes from the master branch to the website.
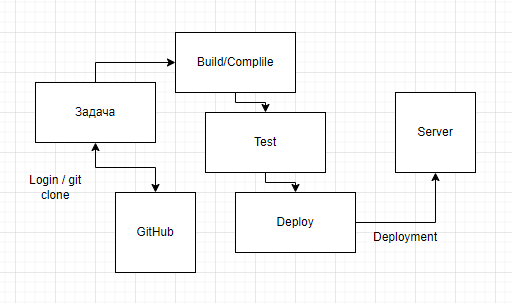
Scheme of the auto-deploy job
In Jenkins, a job is created and configured for this, which will go to GitHub, download the repository to the system, and then send the update to the website.
To do this, you must first:
- Install the Publisher over SSH plugin.
- Configure access to the server to host updates.
- Set up access to the git repository to poll for updates.
- Set up a webhook in git.
Installing Publisher over SSH
To install the plugin, go to Settings Configure Jenkins/Manage Plugins. Go to the available tab and install the Publisher over SSH plugin.
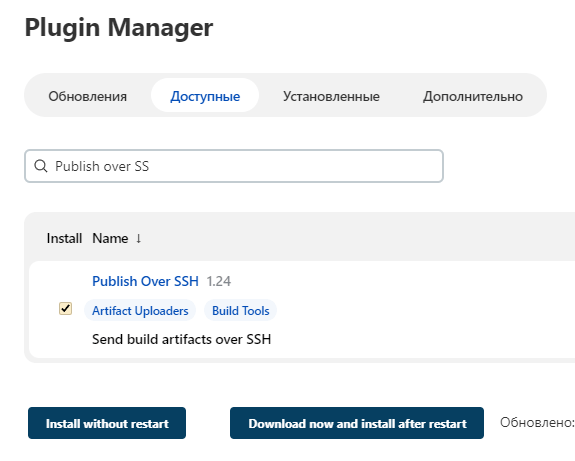
Plugin Installation
Configuring SSH access to the server
After installation, you need to add access to the server to which updates will be sent. To do this, go to Jenkins Settings/System Configuration/Publisher over SSH and configure access by SSH key.
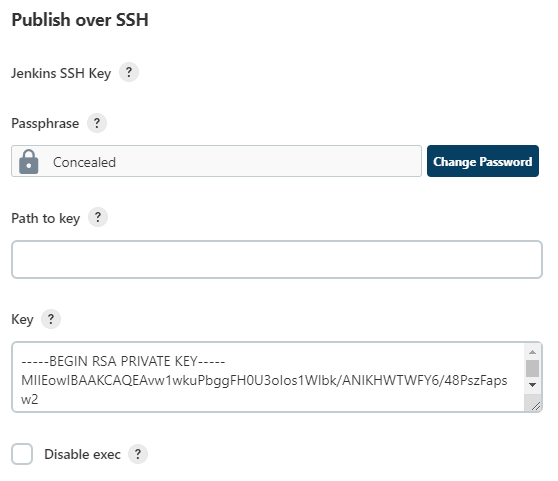
Setting up a private key
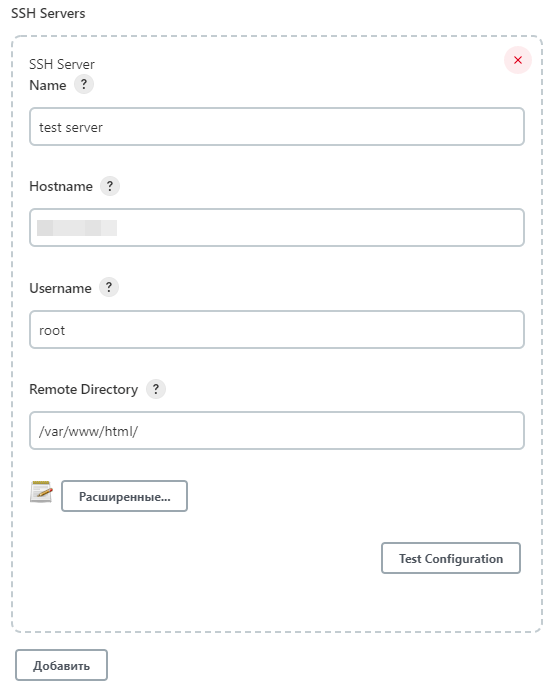
Setting up access to the website
In the Remote Directory, we have specified a folder that will open after authorization. This folder is the root of our website. Git files will be placed there.
Configuring repository access
To access the private repository, create SSH keys and add the public key to GitHub.
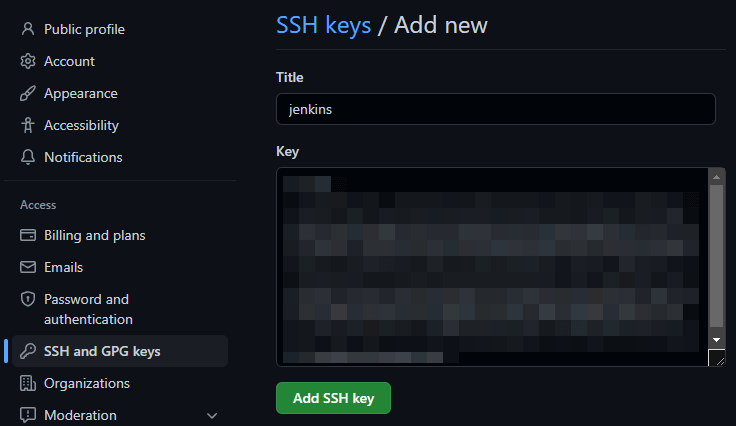
Adding a public key to Git to set up access
Now we need to set up Git access from Jenkins. Therefore, go to Jenkins Settings/Manage Credentials.
Click Add Credentials and fill in the settings for the repository:
- Select SSH Username with private key.
- Enter an ID (optional).
- Fill in Username (your GitHub user).
- Enter the private key in the Private Key field.
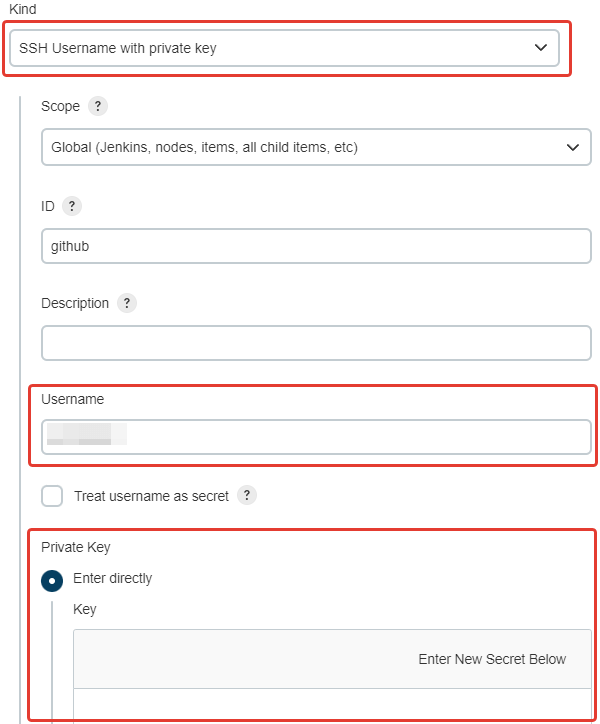
Configuring Git Access
Setting up a webhook in git
In order for Jenkins to start the job only when updates are available, you need to add a webhook in the GitHub repository settings. According to it, GitHub will be able to initiate the launch of the job.
To do this, specify the webhook URL: http://server_name:8080/github-webhook/. The rest of the settings are left as default.
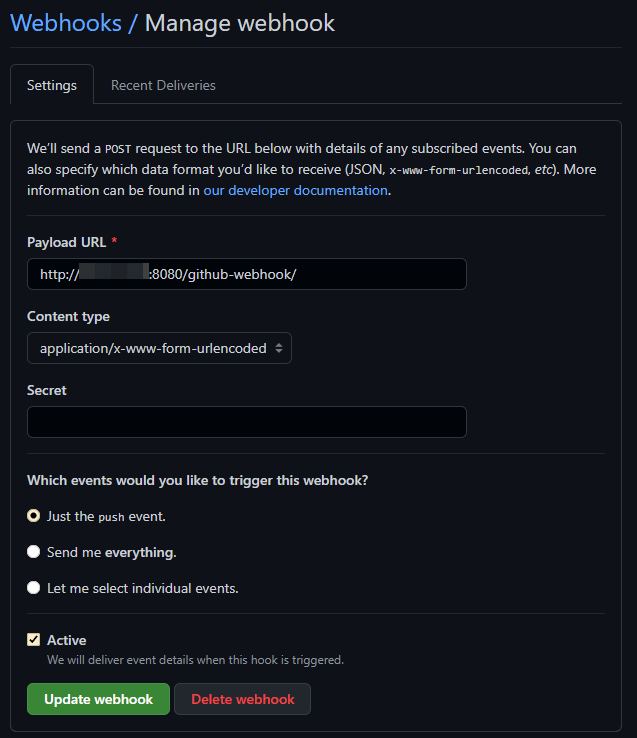
Setting up a webhook
Now that the permissions are configured, you can start creating a job. We will create a job that will be triggered by the presence of updates in the repository.
Creating and configuring a job
On the main page, click Create Item. Then enter a name and select Create job with free configuration.
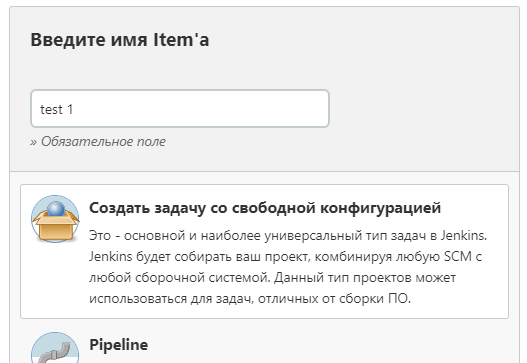
Create a job
In the Source code management section, check the Git box and configure access. We also indicate that the changes will be downloaded from the master branch.
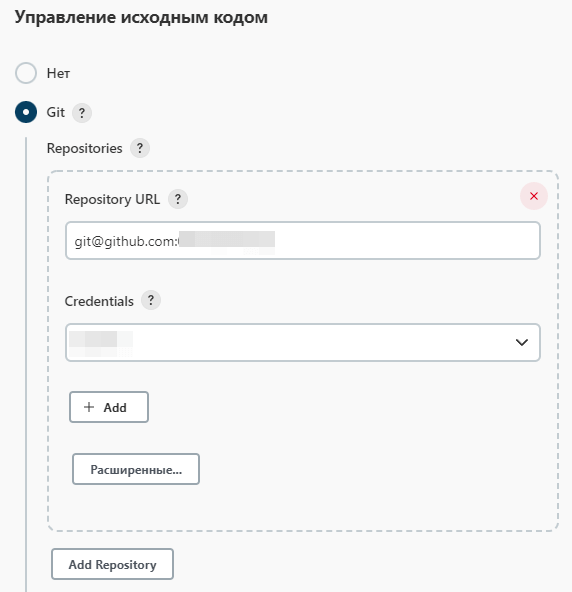
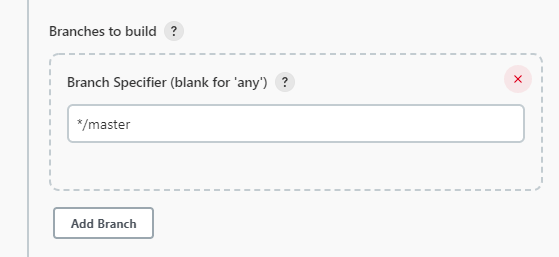
Setting up a connection to a repository
In the Build triggers section, specify GitHub hook trigger for GITScm polling. This means that when a new commit appears in GitHub, the job will start automatically.
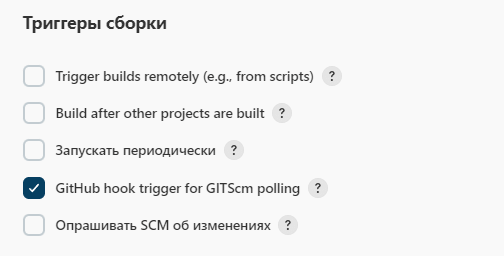
Trigger setting
Next, in the Post-assembly operations section, we specify where to send files after downloading from GitHub. To do this, select the operation Send build artifacts over SSH.
Then we specify the SSH server we configured earlier and in the Source files field we specify which files from the repository to transfer. And in Exec command we specify the command that will be executed after the transfer, for example, you can specify service httpd restart.
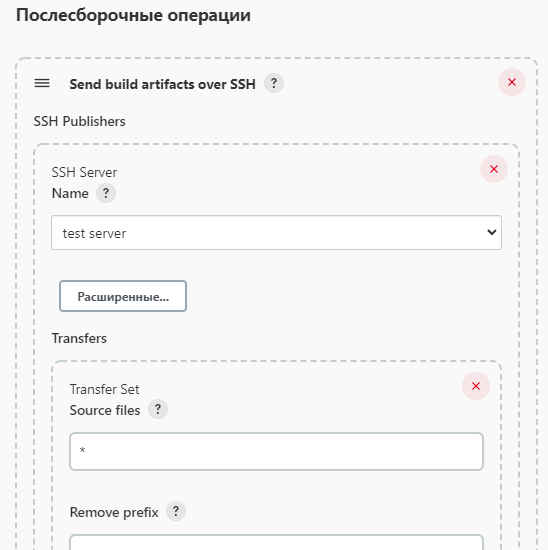
Configuring Update Delivery
Ready. We save the job and look at the main screen the result of processing.
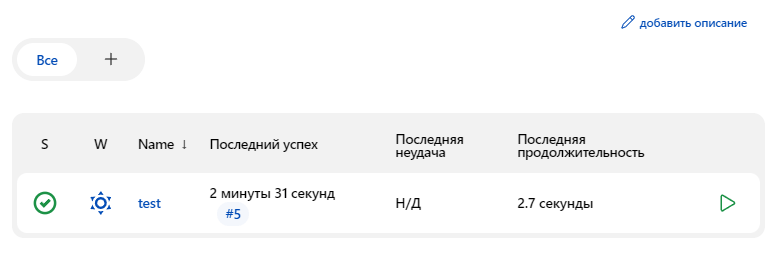
Job progress monitor
If the job was completed with an error, Build History/Console Output will help you deal with the error. While the job is running, the Console output describes what happened, so it will help resolve any error.
Conclusion
We looked at a simple example of using Jenkins to automatically push updates from GitHub. The task is primitive, but in practice there are already many interesting things that can be organized using this tool. It is worth noting that Jenkins is great for professionals with little experience, so it can be easily mastered in a few hours of work.
Our company offers software installation and configuration services, custom development and many other services. You can always contact us for help or advice and solve the problem at reasonable prices.